How to Add a Click-to-Call Button to WordPress to Boost Engagement
You want to add a call button to your WordPress website?
Hey there, WordPress enthusiasts! Today, we're diving into the realm of customer engagement and seamless communication. In this digital age, user interaction is vital for online success. So, let's take a step to improve that interaction by adding a click-to-call button to your WordPress site. Trust me, it's easier than you think!
Let's dive right into it!
Why Should You Add a Click-to-Call Button in WordPress?
You might wonder, "Why a click-to-call button?" Well, the answer lies in convenience and instant communication. With this button, your website visitors can dial your number directly just by clicking on the button. This reduces hurdles between you and your potential customers, enhancing user experience.
Moreover, businesses that use click-to-call buttons see an increase in their conversion rates. That's right - it's a simple yet powerful tool for boosting customer engagement. Don't underestimate the power of simplicity. This button might be small, but it can have a mighty impact on your customer interactions and sales.
So, without further ado, let's get to the steps.
Step 1: Open WordPress Admin Panel
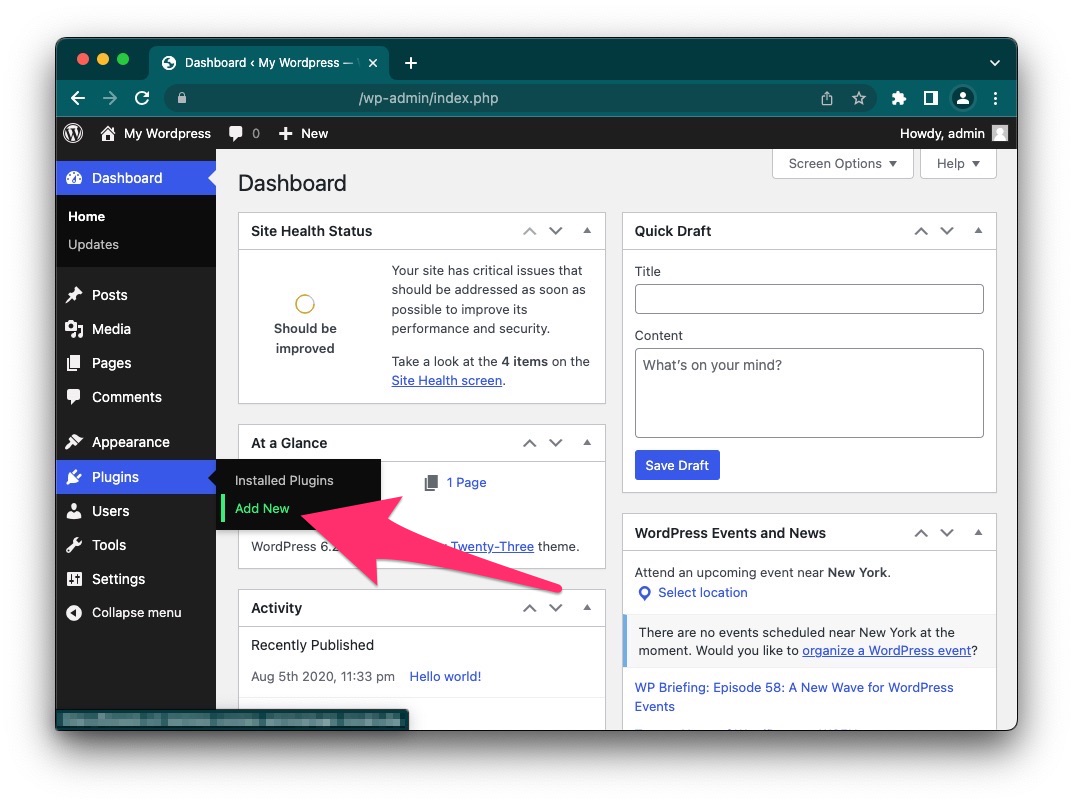
First things first, log into your WordPress account and open your Admin Panel. This will take you to your website's dashboard, which is like the control room of your website. Here, you'll see a bunch of options on the left side. Look for the 'Plugins' option and click on it.

Step 2: Search For a Plugin
Once you're in the Plugins section, click on the 'Add New' button at the top. This will take you to the WordPress plugin marketplace, where you can find a plugin for virtually anything. In the search bar, type "call from web" and press enter.
You'll see a variety of plugins and each one has its unique features. We will use 'Call From Web'. Remember, the plugin you choose is going to play a crucial role in creating that seamless user experience we talked about earlier.

Step 3: Install 'Call From Web' Plugin
You've found your plugin; let's install it!
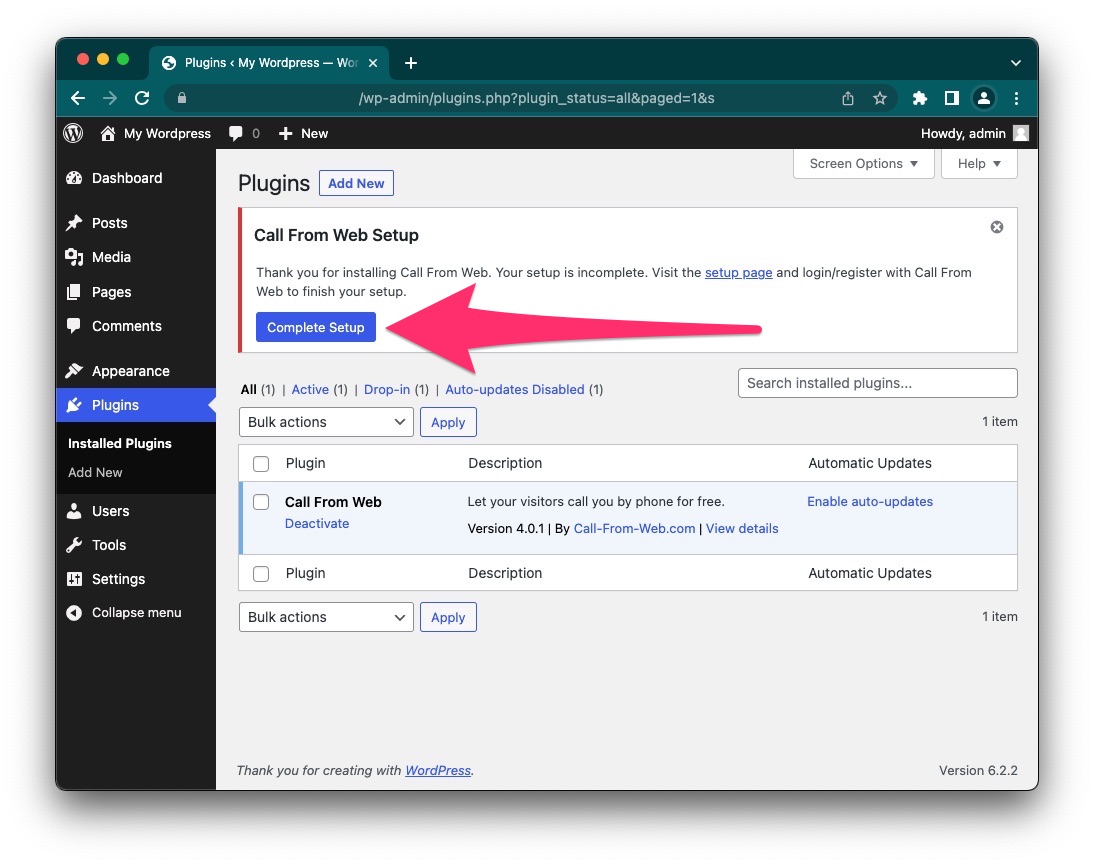
Click the “Install Now” button next to your chosen plugin and then activate it. This particular plugin, 'Call From Web', is excellent for adding a click-to-call button.

Once activated, you will be prompted to finish the setup. Here you can customize the appearance of your click-to-call button. Choose colors that match your brand. You can also decide where on the page the button should appear. Customize it to fit the style and vibe of your website.

You're doing great! Let’s get this button live.
Step 4: Link and Verify Your Phone Number
Almost there! Let’s link your number.
In the plugin settings, enter the phone number you want the calls to be directed to. Make sure it's correct!
Once you’ve entered your number, verify it. This step is crucial as it ensures that the calls are coming to the right place. Some plugins might send a verification code to the number you entered.
It's also a good idea to do a test run. Visit your website and try the click-to-call button yourself. See if the call is coming through and check the call quality. Make sure everything is seamless.
There you go! Your click-to-call button is up and running!
Wrapping It Up
So there you have it! A step-by-step guide to adding a click-to-call button to your WordPress website. Simple, right?
Adding this button is more than just a feature; it’s about enhancing customer experience. It’s about opening lines of communication and letting your visitors know you are accessible. In the fast-paced world we live in, this little button could mean the difference between a lead and a lost customer.
Now it’s time for you to take the reins. Add that click-to-call button and open the doors to seamless customer communication. Your clients will thank you, and your business will thrive.
A Final Tip
Before we say goodbye, here’s a pro tip: keep an eye on the analytics. Most plugins provide insights into call data. Use this to your advantage. Know when the majority of your calls are coming in and ensure you are staffed accordingly.
Also, don’t forget to engage with your audience. Encourage them to use the button whenever they have queries. Be responsive and build that connection.
Good luck, and here’s to excellent customer communication!